If you’ve ever reached for a kitchen sponge and felt that cold, slimy texture, you already know the problem. Wet sponges sitting on the countertop don’t just look messy — they’re one of the most bacteria-prone spots in your entire home.
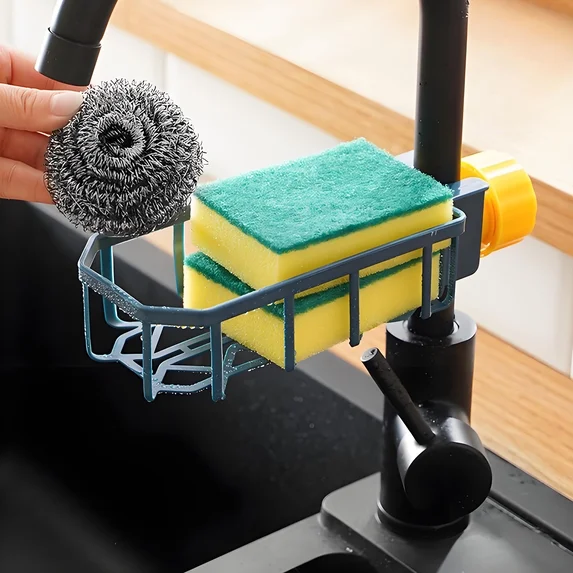
Kitchen sponges are often cited as one of the most bacteria-prone spots in the home because trapped moisture allows bacteria to multiply quickly. The culprit? Trapped moisture with no airflow.
The good news: there’s a dead-simple fix that costs less than $10, takes five minutes to set up, and completely hides your sponge from view. Here’s exactly how to create a hidden sponge drying station inside your sink.
Why Your Kitchen Sponge Is a Bacteria Magnet
Before we get into the solution, it helps to understand why sponges get so gross so fast.
Most people store their sponge flat on the counter or in a small dish next to the sink. The problem with both options is the same: the bottom of the sponge stays wet. When a sponge can’t dry out fully between uses, bacteria multiply rapidly in the warm, moist environment.
Common storage mistakes include:
- Leaving the sponge flat on the counter (bottom never dries)
- Using a solid dish or tray (traps water underneath)
- Storing it near the faucet (gets splashed repeatedly)
- Keeping it inside a closed cabinet (zero airflow)
The ideal sponge storage solution does three things: keeps the sponge off flat surfaces, allows 360-degree airflow, and drains water immediately.
That’s exactly what the inside-the-sink wire basket method does.
What You’ll Need
This hidden sponge drying station requires just two items, both available on Amazon or at any dollar store:
1. A small wire mesh basket
Look for one with open wire construction (not solid sides) and a size that fits comfortably inside your sink without blocking the drain. A basket roughly 4–6 inches wide works well for most standard sponges and a dish brush.
2. Two strong suction cups with hooks
Make sure they’re rated for wet environments. Suction cups designed for bathroom use (like shower caddies) work perfectly. Avoid cheap plastic ones — they fall off after a few days.
Optional additions:
- A second small basket if you have multiple sponges
- A clip or zip tie to secure the basket more firmly
Total cost: $5–$12
Setup time: Under 5 minutes
Step-by-Step Hidden Sponge Drying Station Setup Guide
Step 1: Clean and Dry the Inside Wall of Your Sink
Suction cups only grip properly on a clean, smooth surface. Before attaching anything, wipe down the inside wall of your sink with a dry cloth. Remove any soap residue or water droplets.
If your sink has a textured surface, suction cups may not hold well. In that case, look for adhesive-backed hooks instead — they work on more surfaces and are just as easy to remove.
Step 2: Choose the Right Height
This is the most important part of the setup. You want the basket positioned:
- High enough so it doesn’t sit in standing water when the sink fills up
- Low enough so it doesn’t interfere with washing large pots or pans
- Away from the direct stream of your faucet
A good rule of thumb: place it about one-third of the way down from the top of the sink wall, on the side opposite your faucet.
Step 3: Attach the Suction Cups
Press each suction cup firmly against the sink wall, holding for 10–15 seconds. Give it a firm tug to make sure it’s locked in. If it slides or pops off, dry the surface again and retry.
For extra security, some people use a thin strip of silicone adhesive in addition to the suction cups. This is optional but helpful in high-humidity kitchens.
Step 4: Hang the Wire Basket
Hook the wire basket onto both suction cup hooks. Make sure it sits level and stable. Give it a gentle shake — it should feel solid, not wobbly.
If your basket feels unsteady, adjust the suction cup positions so the hooks align better with the basket’s hanging points.
Step 5: Place Your Sponge Inside
Put your wet sponge and dish brush directly into the wire basket. Water will drip straight down into the sink drain. The open wire design allows air to circulate around all sides of the sponge, dramatically speeding up drying time.
That’s it. Your hidden sponge drying station is ready to use
Why This Works So Well
This hidden sponge drying station solves every problem with traditional sponge storage:
| Problem | Traditional Storage | Wire Basket Inside Sink |
|---|---|---|
| Bottom stays wet | ✅ Yes | ❌ No — drains instantly |
| Bacteria buildup | ✅ High risk | ❌ Much lower risk |
| Clutters countertop | ✅ Yes | ❌ Completely hidden |
| Airflow | ❌ Poor | ✅ 360-degree |
| Cost | $0–$15 | $5–$12 |
The wire construction is key. Unlike solid dish holders or ceramic sponge trays, wire mesh doesn’t trap water anywhere. Every surface of the sponge is exposed to moving air.
Tips to Keep Your Sponge Even Cleaner
Once your hidden sponge drying station is set up, these habits will keep it working even better. The drying station handles moisture, but here are a few extra habits that make a big difference:
Microwave it once a week.
Place your damp sponge in the microwave for 60–90 seconds. The heat kills most bacteria. Let it cool before touching — it gets very hot.
Replace it every 2–3 weeks.
Even with perfect drying habits, sponges wear out. A good rule: if it starts to smell even after drying, it’s time for a new one.
Keep one sponge for dishes, one for surfaces.
Cross-contamination is a real issue. Color-code them if it helps — blue for dishes, yellow for counters.
Rinse thoroughly after every use.
Squeeze out as much water as possible before placing it in the basket. The less water it holds, the faster it dries.
Other Creative Uses for the Wire Basket
Once you have a suction wire basket inside your sink, you may find other uses for it:
- Dish brush storage — keeps the bristles off the sink floor
- Scrubber pads — same drying benefits as sponges
- Small produce rinse — use it temporarily to rinse grapes or cherry tomatoes
- Bottle cap catcher — clip one near the faucet to catch small items
Frequently Asked Questions
Will suction cups hold on a stainless steel sink?
Yes — stainless steel is actually one of the best surfaces for suction cups. Just make sure it’s clean and dry before attaching.
What if my sink has a textured or matte finish?
Suction cups may struggle on textured surfaces. Try adhesive-backed hooks (like Command hooks rated for wet areas) as an alternative.
How do I clean the wire basket itself?
Once a week, remove the basket and rinse it under hot water. Occasionally soak it in a white vinegar solution for 15 minutes to remove any mineral deposits.
Can I use this in a bathroom sink too?
Absolutely. The same setup works great for bathroom sponges, scrubbers, or even a small soap bar holder.
Final Thoughts
A hidden sponge drying station inside your sink is one of those small upgrades that makes a surprisingly big difference in your daily kitchen routine. It takes less than five minutes to set up, costs almost nothing, and solves a problem most people don’t even realize they have.
No more slimy counters. No more bacteria-soaked sponges. Just a clean, organized sink that works better than before.
Try this hidden sponge drying station this weekend — you’ll wonder why you didn’t do it sooner.
How This Article Was Prepared
This article was prepared through AI-assisted research and human editorial review.
The research process included reviewing general information on kitchen sponge hygiene and common storage methods recommended in home organization guidance.
The author did not personally test every sink type. Suction cup hold varies by sink finish.
Editorial Note: Clean and dry the surface before attaching suction cups. Textured or matte sinks may require adhesive hooks rated for wet areas.
Sources reviewed:
- General home hygiene guidance on sponge bacteria
- Home organization product guidance for suction hooks and wire baskets

James L is the founder and editor of Clever Nest Lab, an independent home care website focused on practical, research-based household advice. He reviews manufacturer guidance, official documentation, and reliable sources to turn useful information into clear, practical guides.
Clever Nest Lab distinguishes between first-hand testing and research-based recommendations. The goal is to help readers better understand common household problems, follow safer cleaning and maintenance practices, and make informed decisions.